Tech Writing Sample #1
No code pull request walkthrough
By Taylor Banks
A beginner-focused walkthrough for creating pull requests using GitHub’s web interface (no terminal required).
A pull request (PR) is how developers propose changes to a shared codebase. It lets you ask others to review and approve your edits before merging them into the main project. Pull requests are at the heart of collaborative software development.
This walkthrough is intended for anyone new to Github, or anyone contributing to a shared coding project for the first time.
Before starting, you should ensure you have:
A pull request is a request for your changes to be reviewed and potentially merged into another branch. It’s a structured way to collaborate, discuss, and track proposed changes.
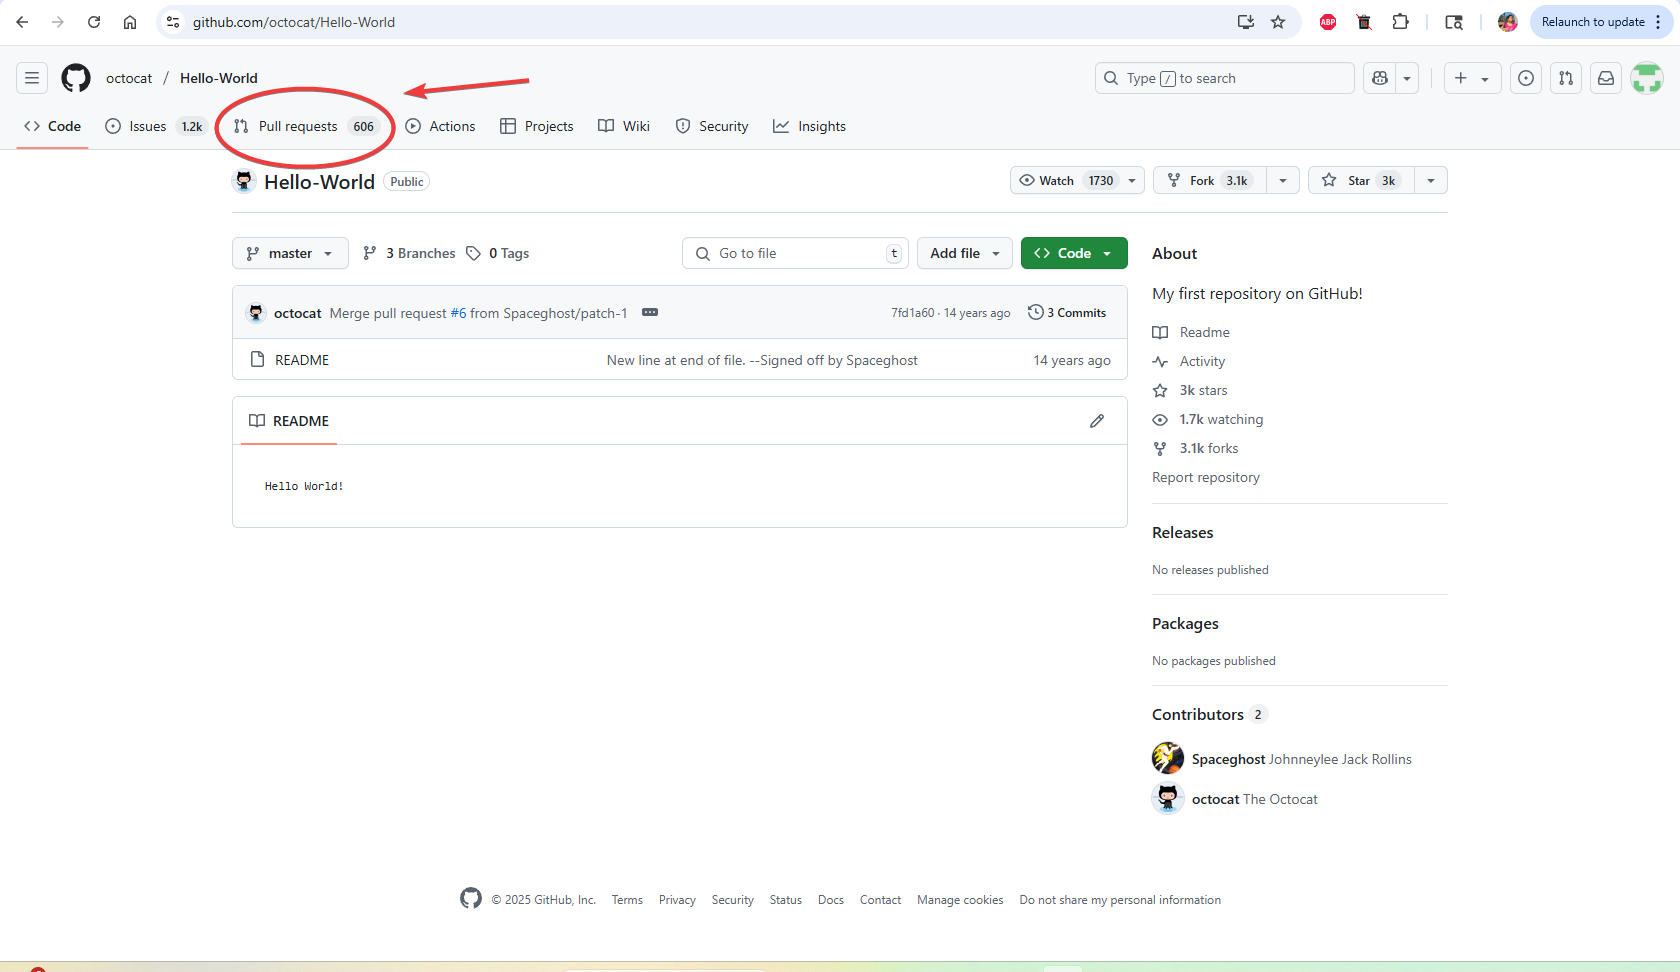
PRs are typically opened:
main or master)PRs let teams:
You may want to use a PR if you want to:
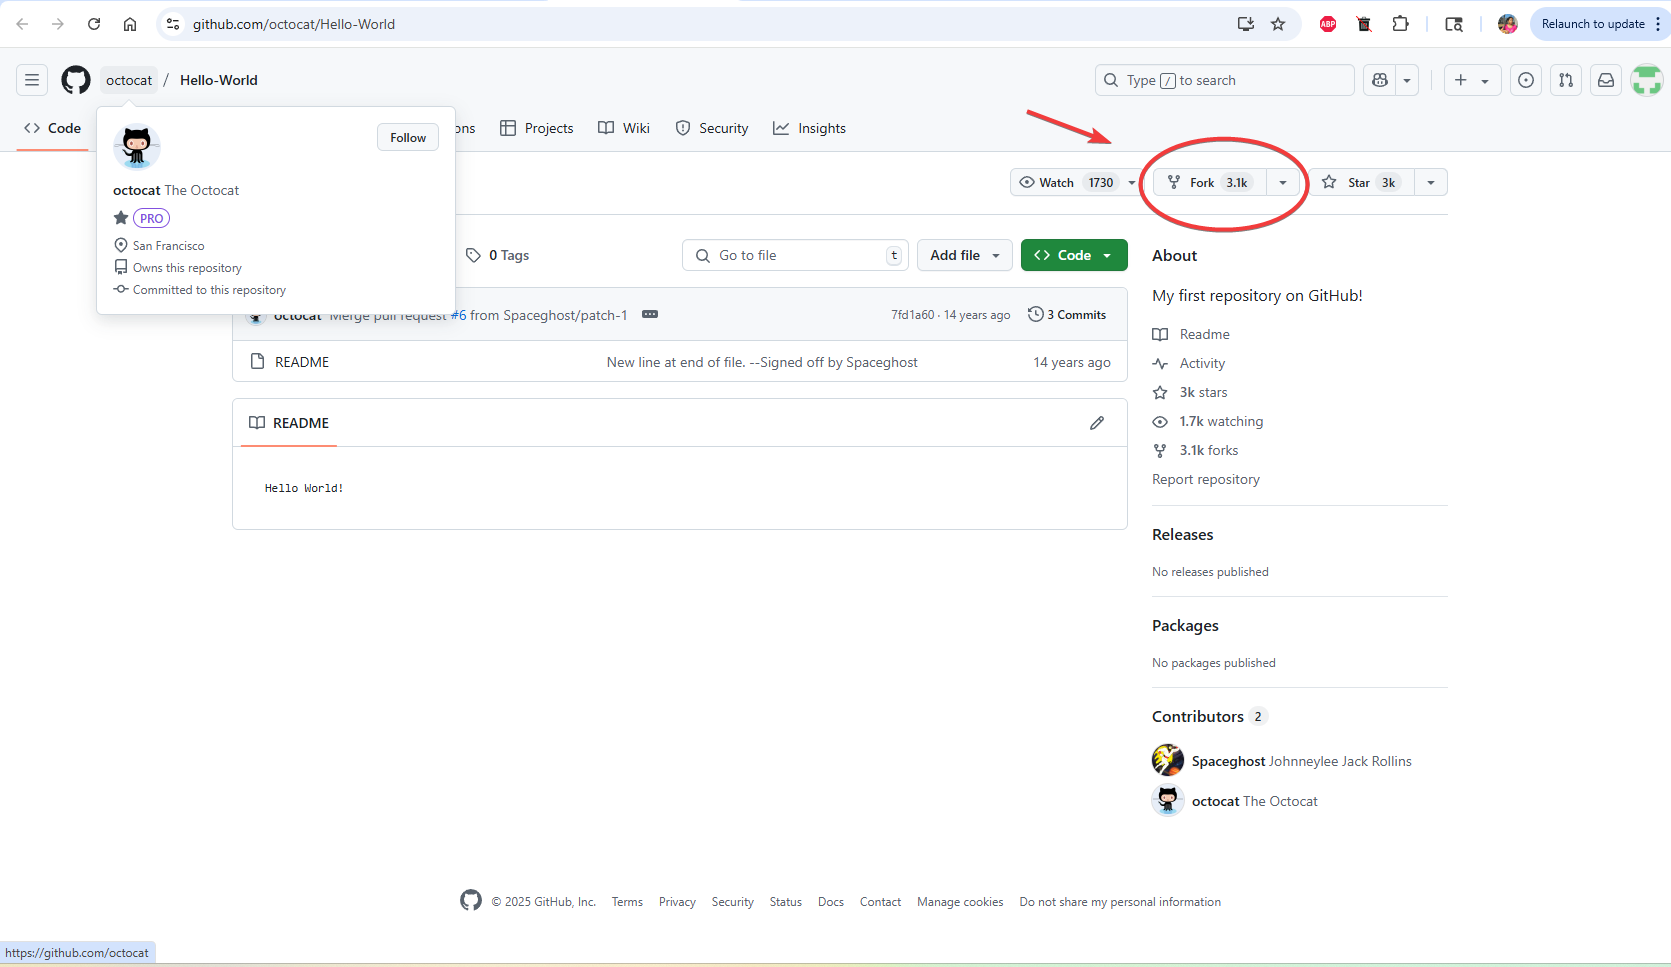
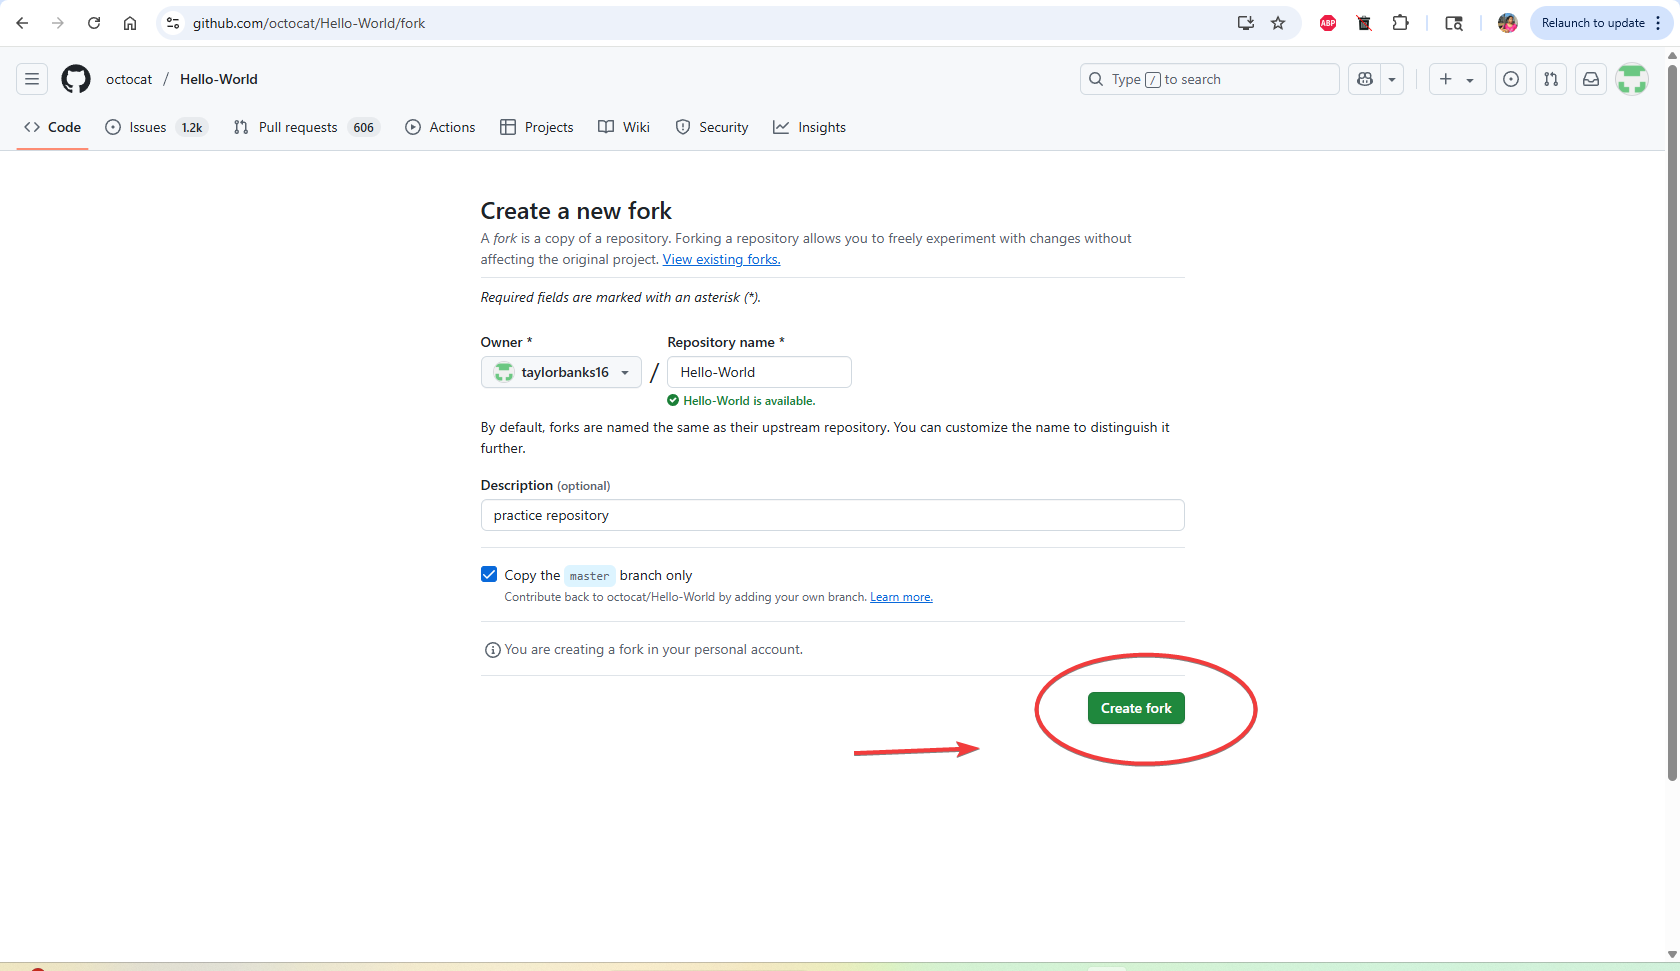
If you’re contributing to a project you don’t own (like an open-source repo), start by forking it. This creates your own copy of the project under your GitHub account, so you can make changes without affecting the original.
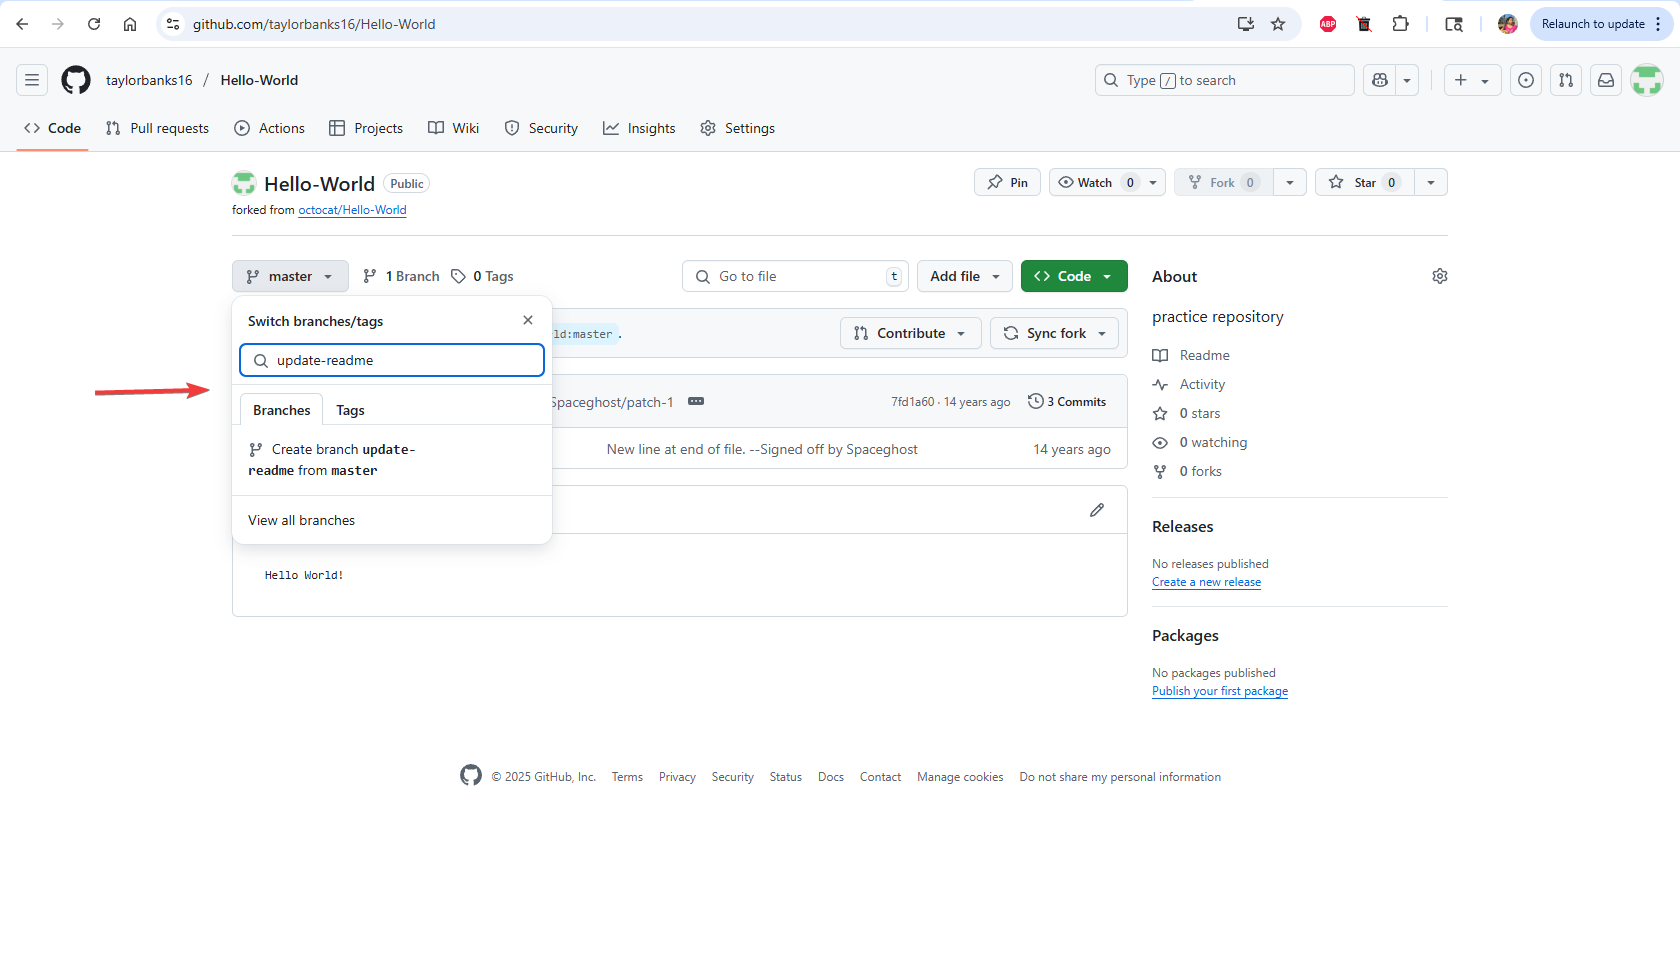
Before making changes, it’s best to create a new branch. This keeps your edits separate from the main project until they’ve been reviewed and approved.
To create a new branch on GitHub:
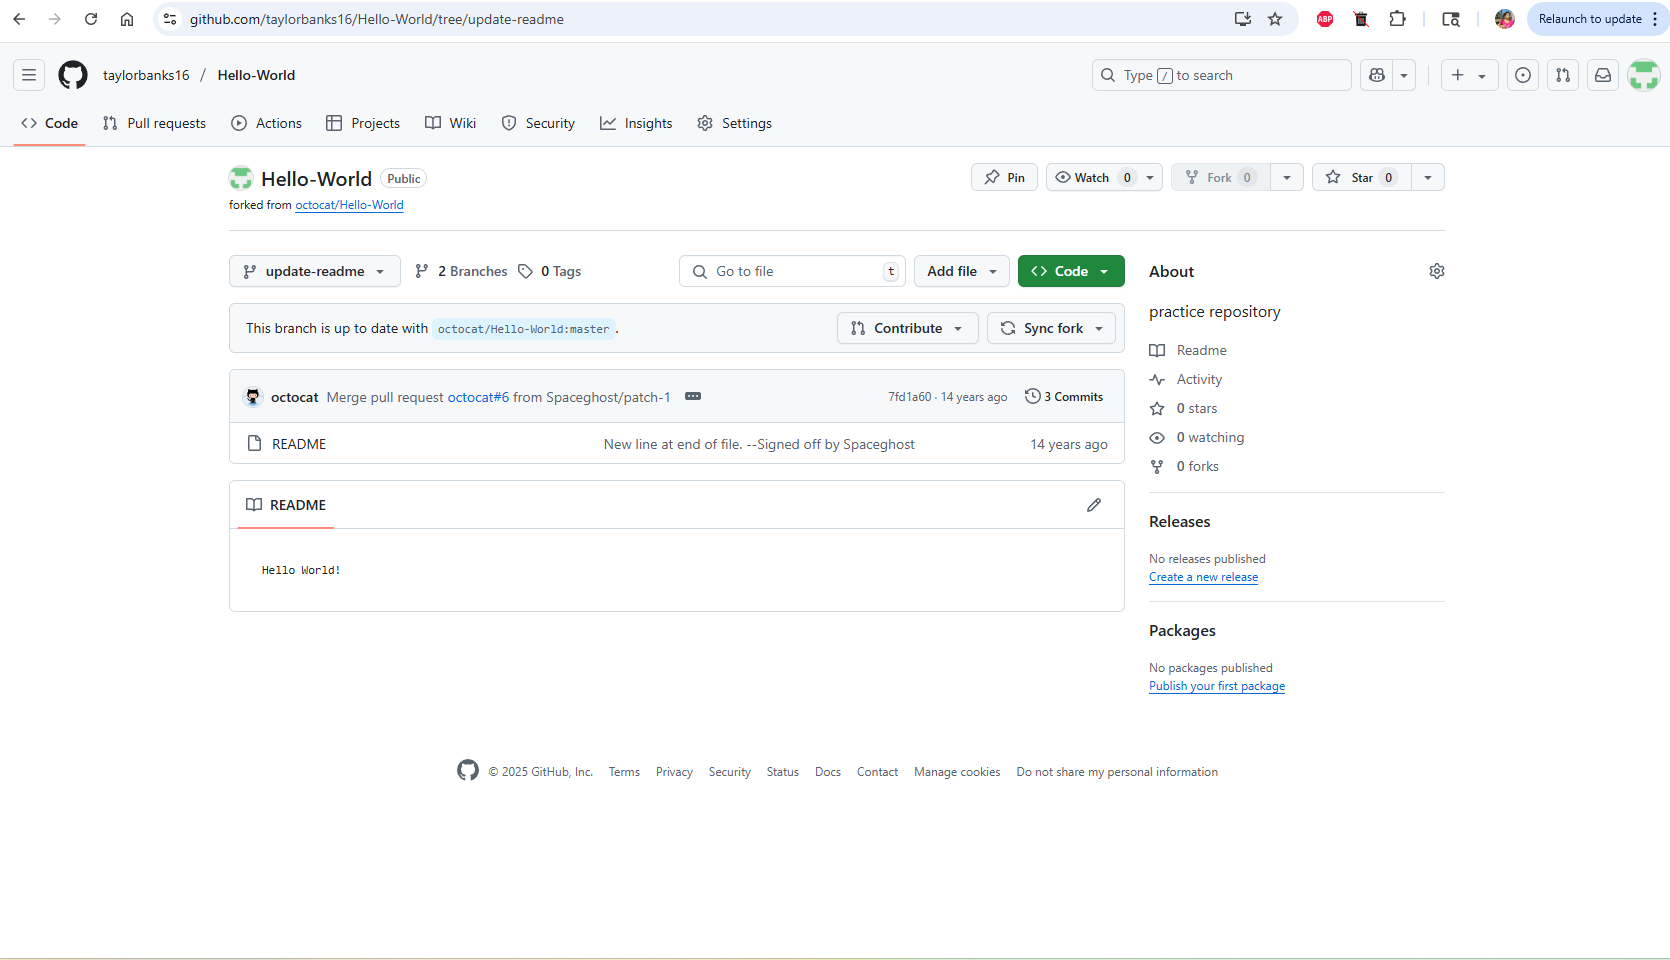
You’re now working in your new branch. Any changes you make will be part of this branch and not the main project.
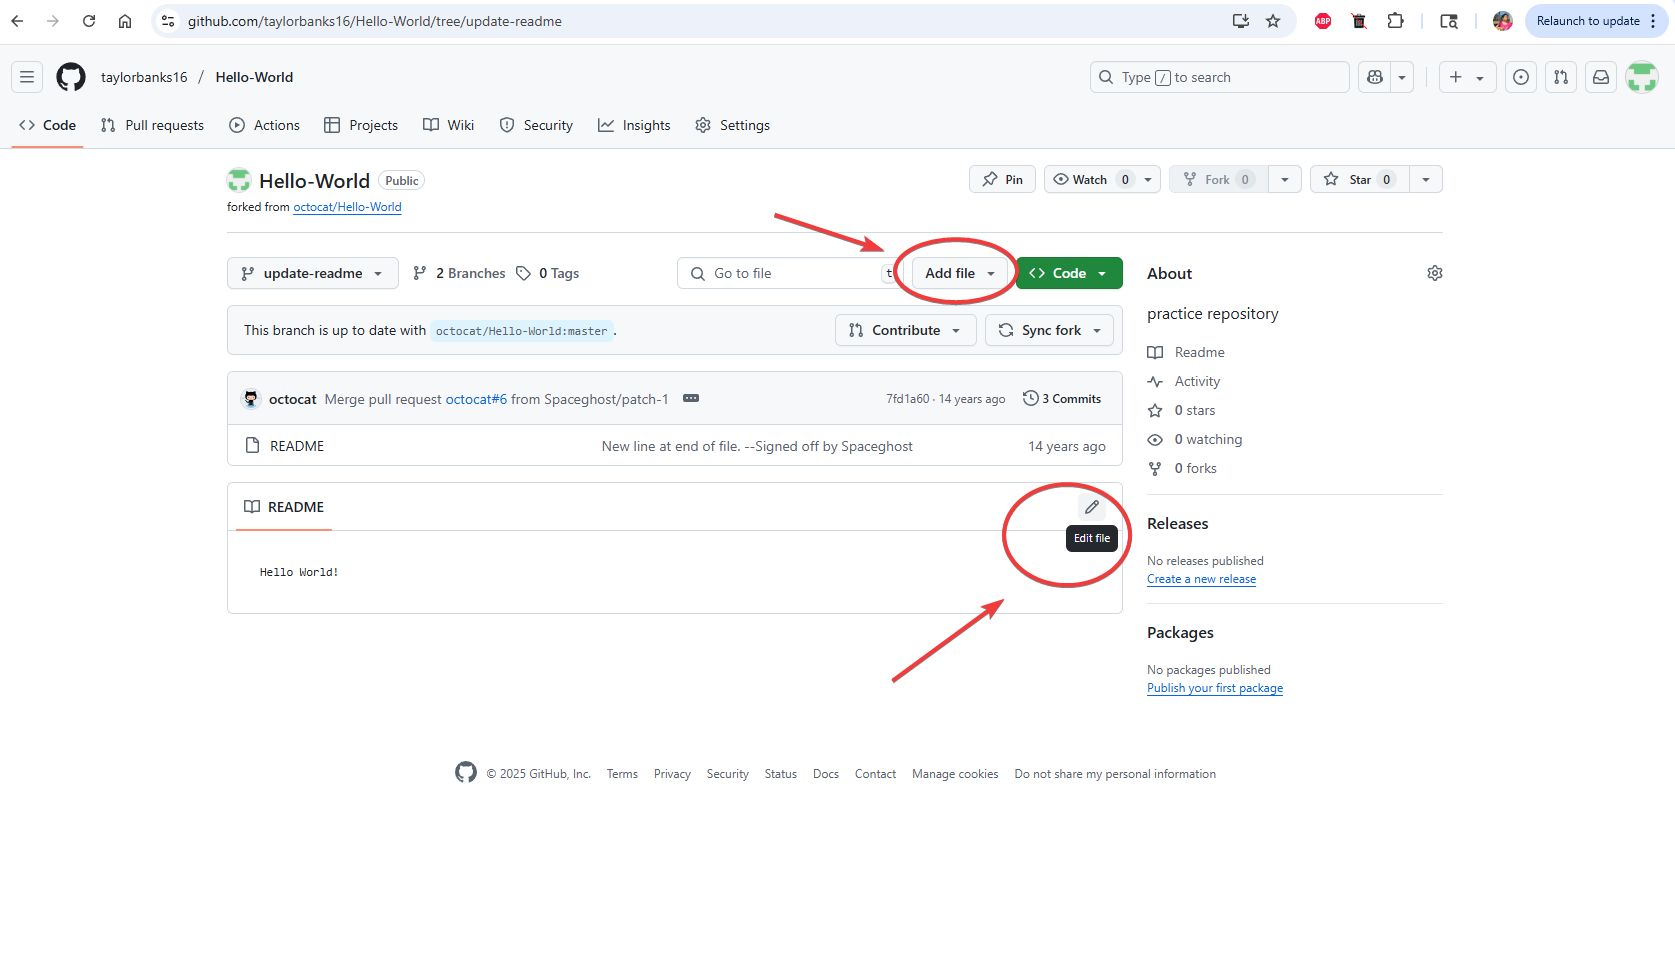
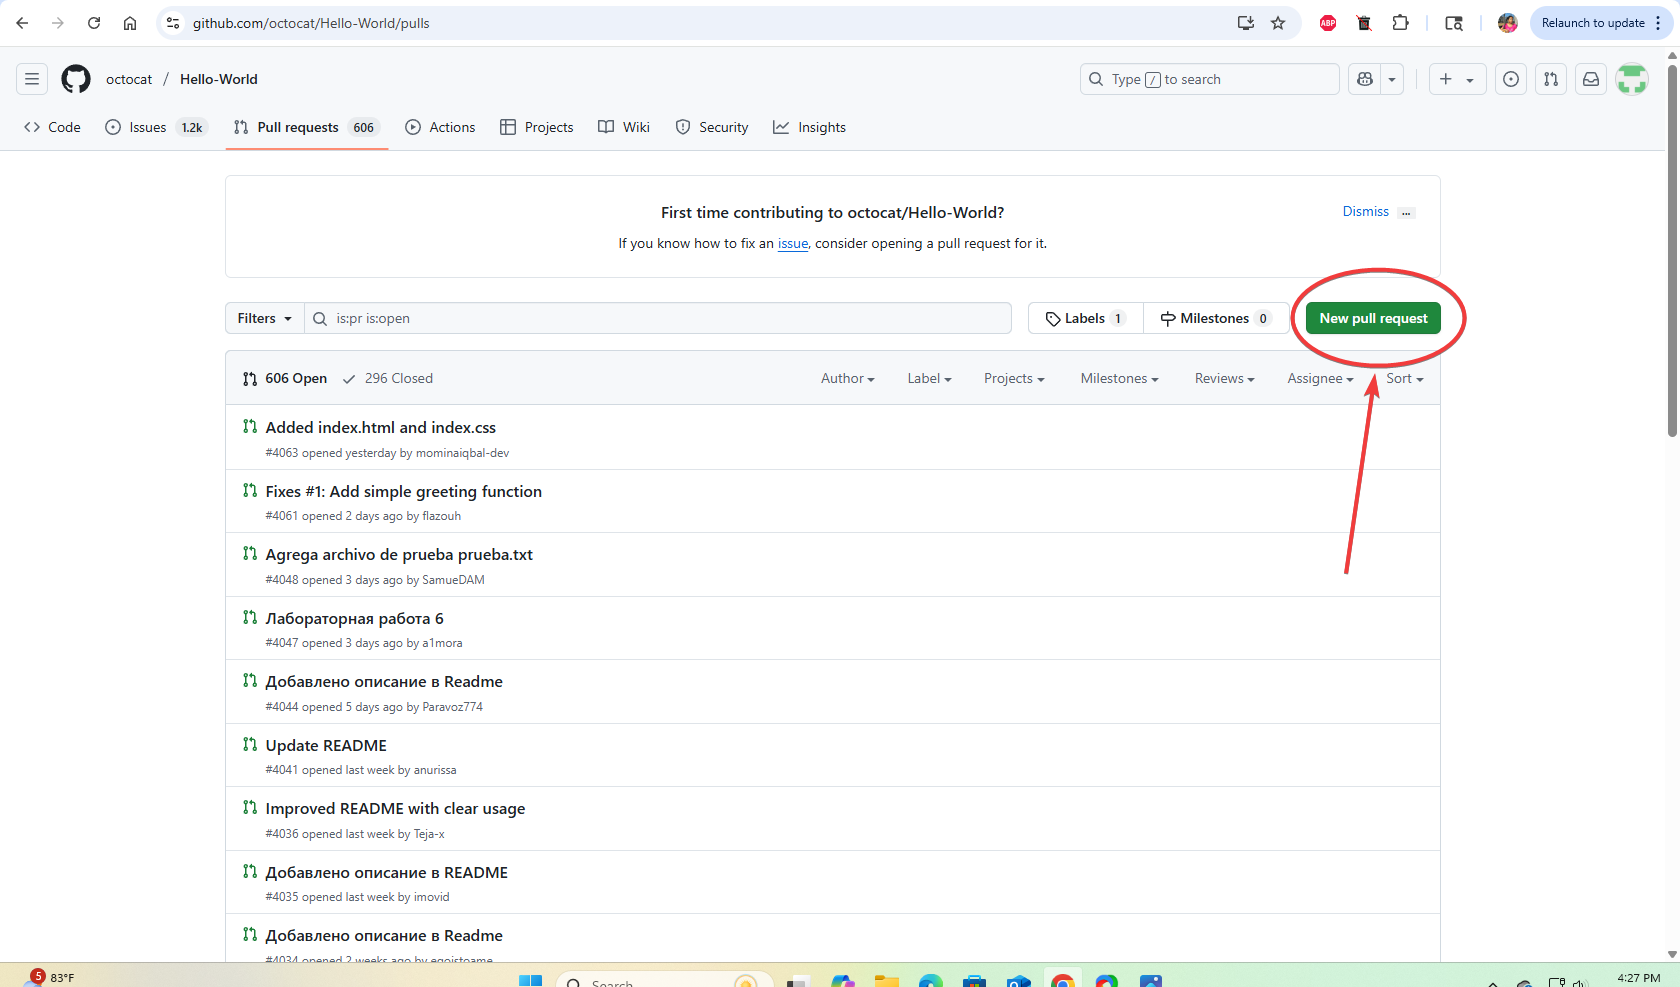
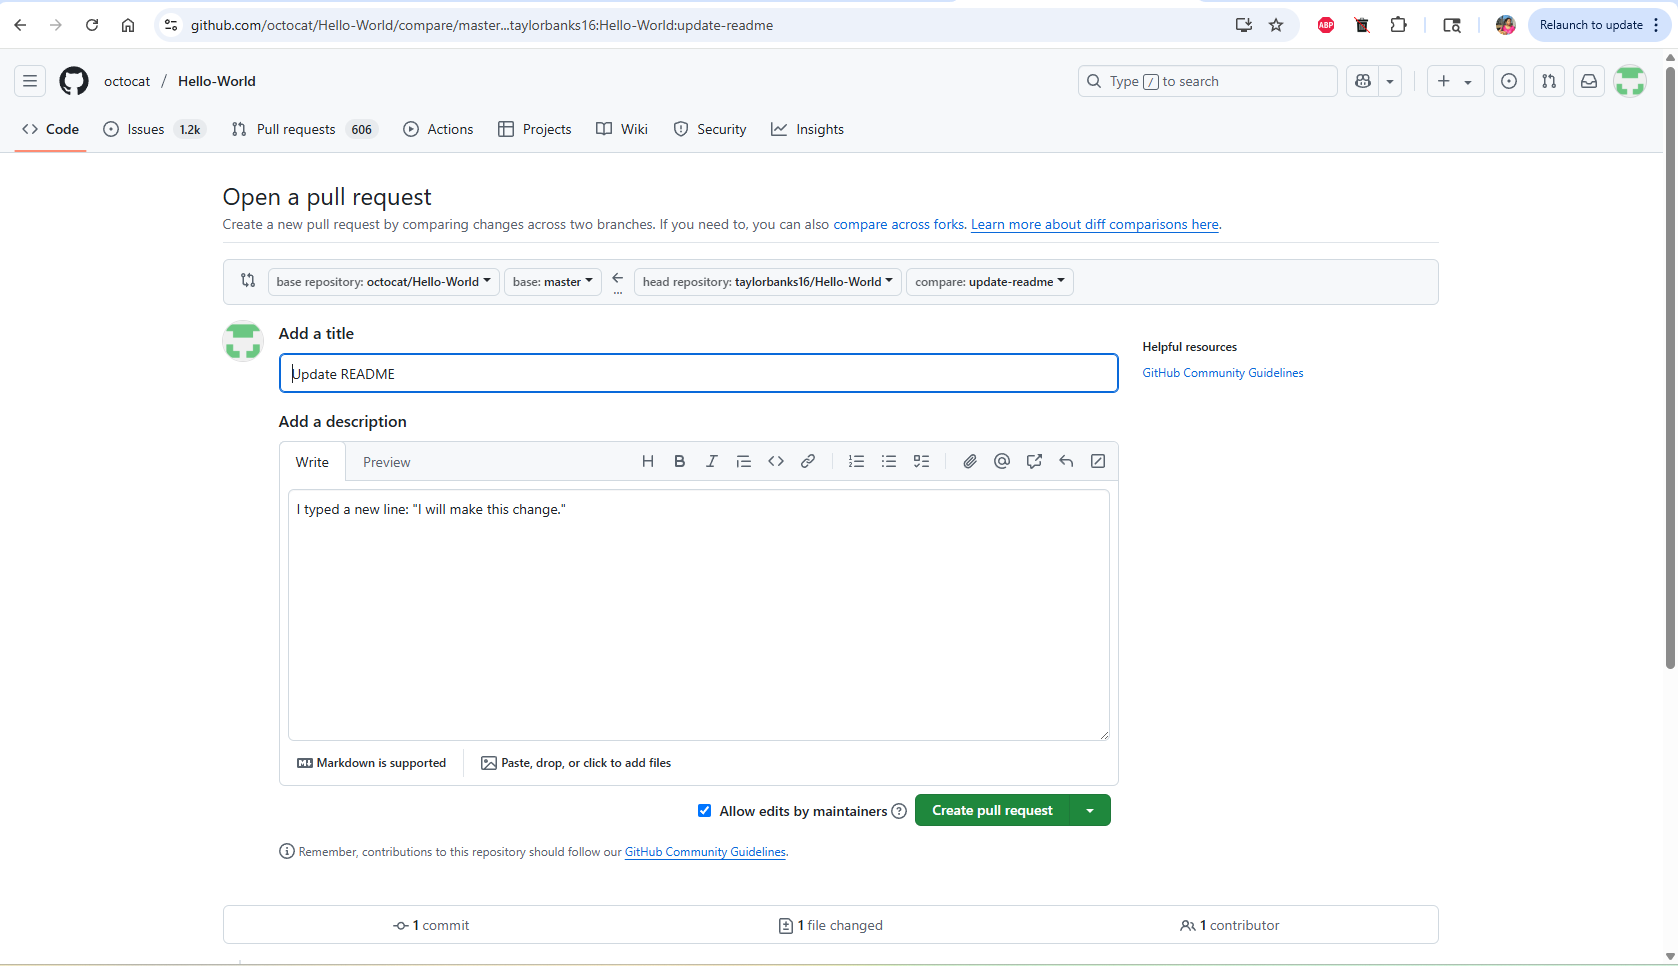
If GitHub shows a green “Compare & pull request” button, click it. Otherwise:

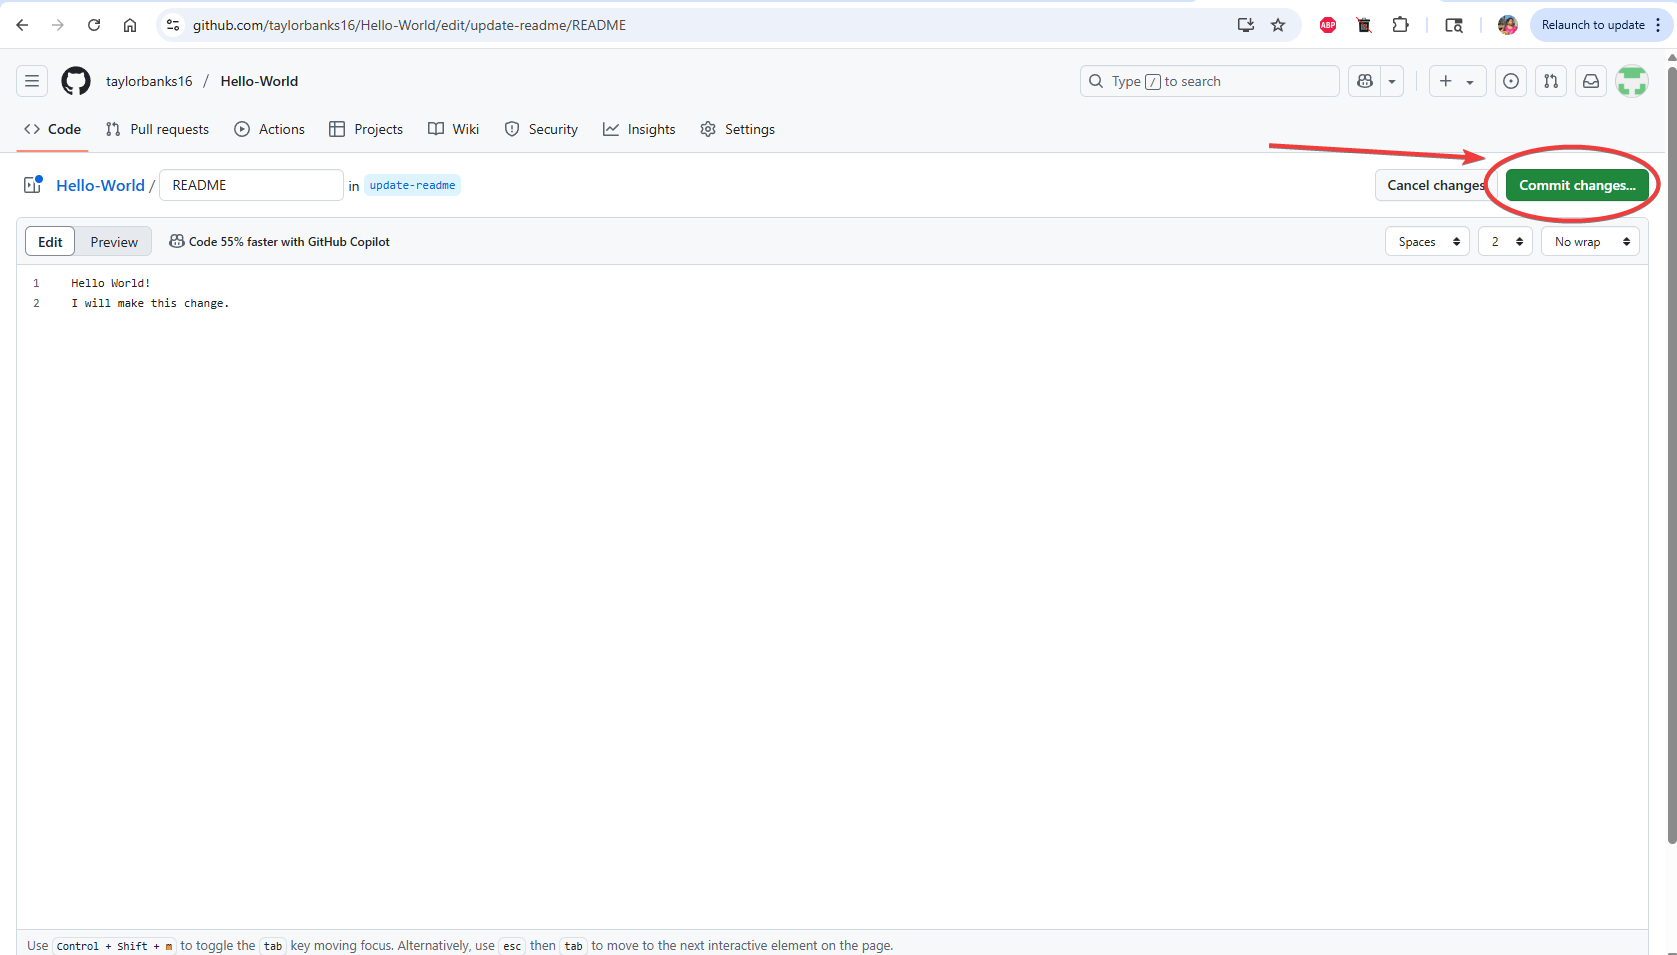
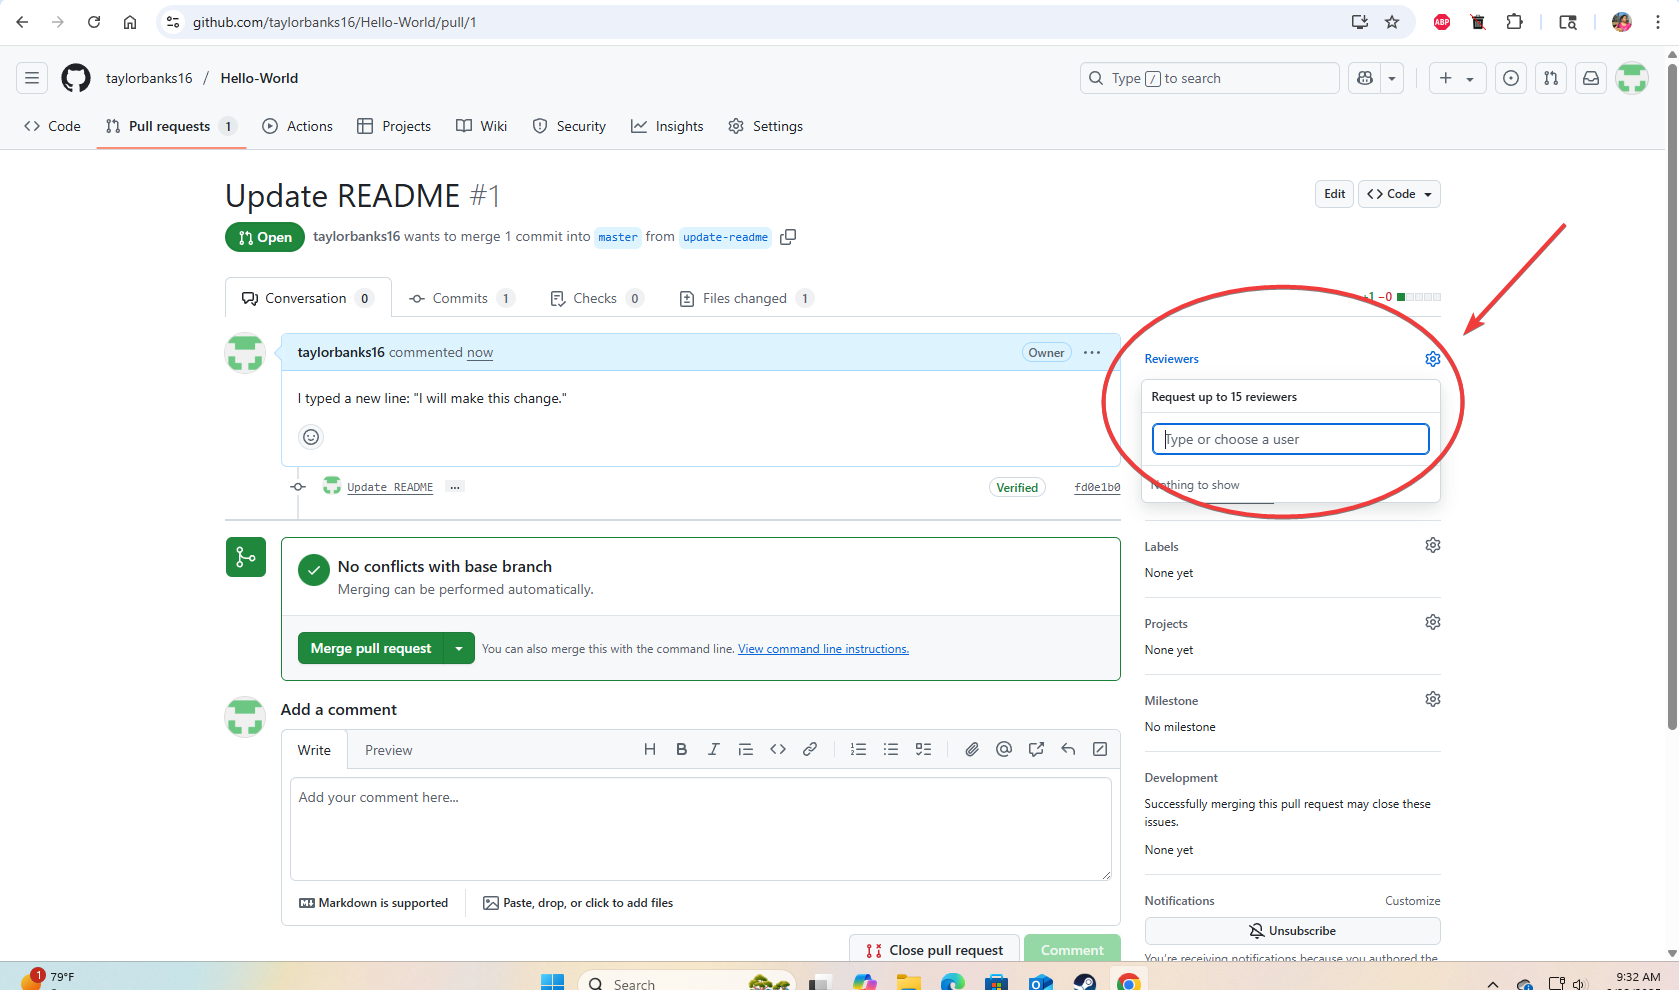
A review is when someone looks at your pull request and either approves it, requests changes, or leaves comments and suggestions. To request a review from a specific person:
 Problem: This defeats the purpose of the PR.
 Solution: Always create a new branch for your changes.
Problem: Reviewers don't know what you changed or why.
Solution: Summarize what the PR does and why it matters.
Problem: You might accidentally merge into the wrong branch.
Solution: Always double check that "base" is the branch you want to merge into and "compare" is your feature branch.
Problem: Your fork may be outdated, leading to merge conflicts.
Solution: Before starting new work, always sync your fork with the original repo.
Problem: These are difficult to review, and it's easy to miss bugs.
Solution: Always make your PRs small and focused. Limit yourself to one or two changes at a time.
Pull requests are more than just a GitHub feature. They’re a best practice for working on shared code. They give teams a safe way to review, improve, and manage changes before merging them into the main project.
Once you understand pull requests, you’re ready to contribute to real-world software — whether it’s your own or someone else’s.
Now that you understand how pull requests work, try it on your own:
This guide was created as part of a technical writing portfolio project. All examples use public GitHub repositories, and screenshots were taken from the GitHub web interface as of June 2025.
No code pull request walkthrough
No-code walkthrough for getting OpenWeather data using Postman.
No-code walkthrough for installing VS Code
an SEO optimized sample post
an SEO optimized sample post